Help / Software Basics / Therapist Software
Therapist Software
Lobby
The lobby launches automatically when the app is opened. A 5-second countdown appears at the start — during this time the patient should look straight ahead so that the scenario is correctly aligned.
Position the patient so that they have as much free space in front of them as possible. This applies to all scenarios.
In the lobby, the aim is for patients to familiarize themselves with a virtual environment as well as with the controllers. Patients learn two essential things here:
Moving in the Space
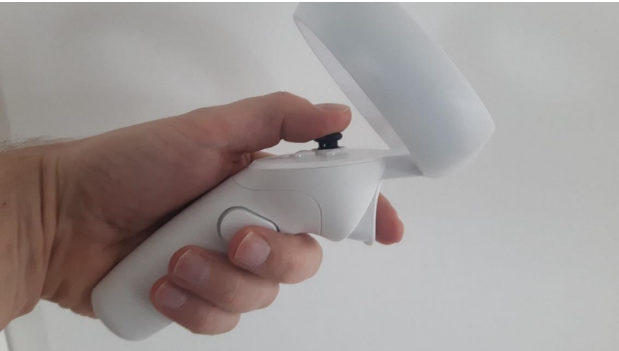
Patients can move through the space using their own steps. For larger distances, however, the teleport function is used. To do this, push the joystick on the controller forward with your thumb. You will then see a colored beam that allows you to aim at any point on the floor. When the beam glows green, you can teleport to that location. To do this, simply release the joystick, and you will suddenly appear at the targeted point. If the beam is not green but red, teleporting to that point is not possible.
Our recommendation: At the beginning, use the teleport function for larger distances. Let the last steps to specific objects be taken with your own steps.
Picking Up Objects
A wide variety of objects in the scenarios can be picked up with the virtual hands. To do this, bring the virtual hand to the object (e.g. a cube), then press the button on the inside of the grip, usually with the middle finger. The hand will close and you will hold the object.
If you want to release the object, simply let go of the button. Small objects, such as a cigarette, are automatically picked up with two fingers. Depending on the position of the hand (palm facing down or up), the cigarette is either held between the index and middle fingers or between the index finger and thumb.
Important note on grabbing:
Important note on gripping:
If you hold an object in your hand and move it into another object (e.g. the book into the table), the object disappears into it, as all objects are only virtual and there is no physical barrier. Therefore, it is important to release the objects in a timely manner.
Scenario Switching
After an introduction in the lobby, select an appropriate scenario from the scenario overview on the left. To do this, click on the image of the scenario and then on the play button below the preview screen.
The scenario will then load and appear in the headset.
Note the 5-second countdown here as well.
Important note:
If you want to switch to another scenario, always return to the lobby first. Only then can a new scenario be selected and started.
Therapist Dashboard
The dashboard is your control centre during the session. It consists of two areas: the upper icon bar with global functions, and the lower control area with scenario-specific options.
Icon Bar

- Camera view
Patient or avatar camera - Rotate scenario
Orientation in the VR space - Hand type
Male / female / neutral - Brightness
In all scenarios - Volume
Music & sound effects - Feedback
Bugs & ideas
Control Area
In the lower area of the dashboard you will see the scenario-specific controls, organised into Presets, Settings, and Interactions. These buttons allow you as a therapist to control the running scenario in real time from outside — without needing to interact with the VR headset.
How to read the scenario descriptions:
On each scenario page you will find two accordions:
Settings — all buttons under Presets, Settings, and Interactions that you as a therapist can use during the session.
Interaction options — actions that the patient can perform themselves inside the VR headset.