Hardware Setup
Preparing the headset
1. Unpack the VR headset and charge it with the white charging cable for about an hour, until the light turns at least blue.
2. Turn on the headset using the power button on the top side. Then, there are a few steps to complete within the headset:
- Connect to Wi-Fi.
- Register with your name and email address.
- Perform some system updates.
- Set up the room boundary.
The controllers will turn on automatically during this process. These are battery-operated and will need to be replaced after frequent use.
Preparing the laptop


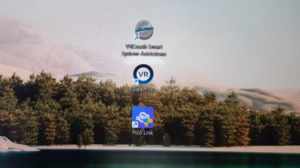
The laptop has been prepared by us so that the most important programs are already installed and centrally placed on the desktop:
- VR Coach App
- SteamVR
- Pico App
Please keep the laptop plugged in at all times and connect it to Wi-Fi. There may occasionally be a pending Windows update — please install it if prompted.
The laptop has two relevant ports for the headset: Mini DisplayPort and a special USB port. Colored stickers are located next to these ports.
Connecting the headset with the laptop

Once the headset is prepared and the laptop is ready, it’s time to establish the connection between the headset and the laptop. Please take the black cable included in the headset packaging and connect any adapters according to the enclosed instructions.
Important: Connect the cable end for the headset to the input on the right side (when viewed from above). You may need to remove the cover from this port.
Plug the other two cable ends (Mini DisplayPort and USB) into the laptop according to the colored stickers.
5 Steps to Start
5 Steps to Start
These steps will be necessary for starting in the future:
- Turn on the headset and confirm or set up the room boundary within the headset.
- Connect the headset to the laptop using the cable.
- Start the Pico app on the laptop (located on the desktop) and select the DP connection.
- In the Pico app, enable the automatic SteamVR startup.
- Once you see the SteamVR environment in the headset, start the VR Coach app on the laptop. The headset and controllers must be in active mode for them to be recognized by the VR Coach app. To do this, move at least one controller slightly while the VR Coach app is loading. Otherwise, the VR Coach app will automatically restart.
Details for Step 3

It is also possible to select a Wi-Fi connection instead of the DP connection for testing purposes. To do this, you need to unplug the cable, as the headset can then be used wirelessly. However, a good quality Wi-Fi connection is required for this.
Details for Step 4

Still having issues?
Always charge the headset’s battery from the port next to the power button, as the port on the right side is used for video transmission and therefore cannot charge during use.
If anything in this process doesn’t work, we are happy to help by phone or in writing.
If you don’t find answers here, we are happy to assist you by phone or email!